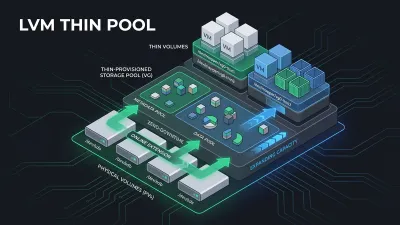
pvscan Not Finding Disk: Troubleshooting Guide
[ info ] // Meta
Category
SysAdminThe email arrived at 07:42 on a Tuesday. A client’s file server had gone quiet overnight. The server rebooted the evening before for a routine kernel update, and when it came back, the OS looked fine. One thing was missing. The 4 TB data volume, the one holding six years of project archives, was not mounted.
I logged in and ran the usual first command.
df -hNo /data. I checked the logical volumes.
lvsNothing. Not even the volume group name in the output. My stomach dropped, because I already knew what the next command would say.
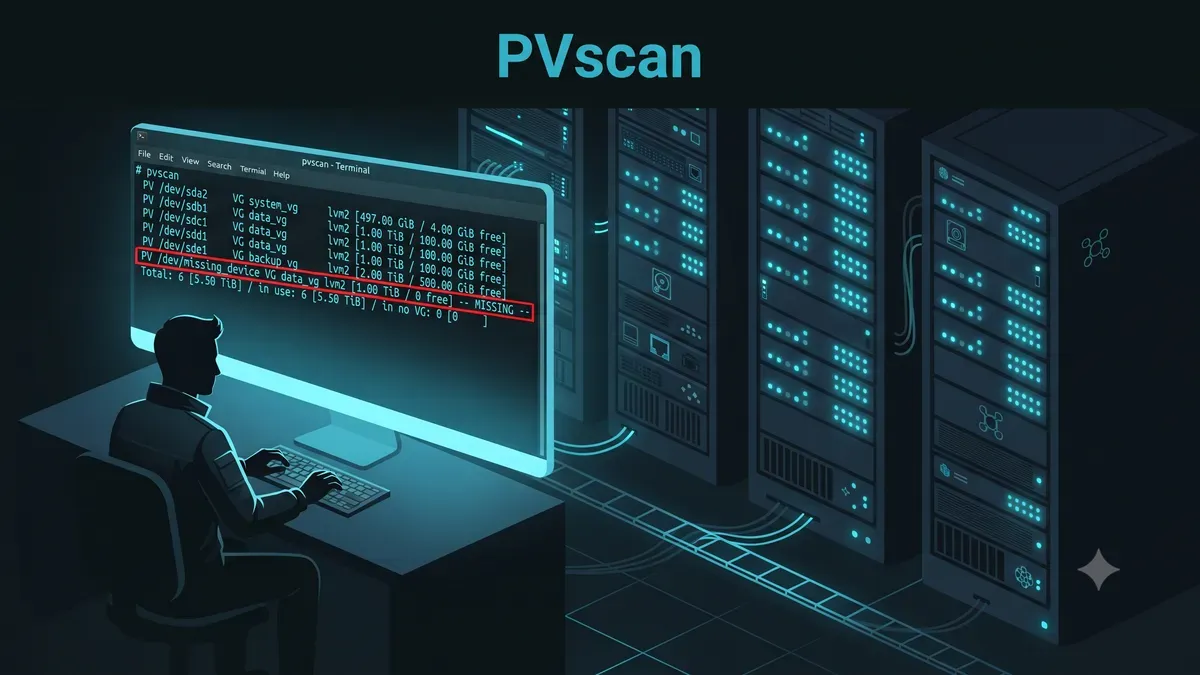
pvscanThere it was. The output showed only the system volume. The disk that should have been the physical volume underneath /data did not exist, as far as LVM was concerned.
Meanwhile lsblk showed the disk sitting right there. The kernel could see it. LVM could not. That gap between what the kernel knows and what LVM believes is the heart of every “pvscan not finding disk” problem, and it is almost always fixable without touching the data at all.
Why pvscan misses a disk it should see
LVM does not read disks directly. It works through a pipeline: kernel, udev, device mapper, then the LVM tools themselves. pvscan walks the block devices the kernel exposes, applies a filter, and reads the LVM metadata it finds on them.
Three things can break that pipeline:
- The kernel does not see the disk. No udev event, no device node, nothing for LVM to scan.
- LVM filters the device out. The device exists, but a rule in
lvm.conftells LVM to ignore it. - The metadata or cache is stale. LVM found the device before, then lost track of it.
I have seen all three in production. The second one, the filter, is by far the most common, and it is also the easiest to fix once you know where to look.
LVM discovery tools: pvscan vs pvs vs lvmdiskscan
Before diving into the fix, it helps to understand which tool shows what. All three commands discover physical volumes, but they walk the stack differently and surface different information.
| Tool | What it scans | Speed | Best for |
|---|---|---|---|
pvscan | Block devices via device mapper, reads LVM metadata | Fast | Quick status check, cache refresh (pvscan --cache) |
pvs | Same block devices, but shows structured PV/VG/LV mapping | Fast | Seeing which PV belongs to which VG, checking attributes |
lvmdiskscan | Raw block devices at kernel level, bypasses device mapper | Slower (rescan) | Finding disks that pvscan and pvs miss entirely |
The critical difference is where each tool stops in the pipeline.
pvscan and pvs both walk through the device mapper layer. If a device filter blocks a disk before it reaches the mapper, both tools will report the same blind spot. lvmdiskscan goes deeper. It scans raw block devices the kernel exposes, regardless of whether LVM has claimed them. When pvscan shows nothing and lsblk shows the disk, lvmdiskscan is the tiebreaker.
# Quick comparison: what each tool sees
pvscan 2>&1 | grep -c 'PV'
pvs --noheadings | wc -l
lvmdiskscan 2>/dev/null | grep -c 'LVM'
If lvmdiskscan finds a disk that pvscan does not, the problem is almost certainly a device filter or a stale cache, not a missing disk. That single observation saves you from blaming hardware when the issue is configuration.
When to use which
- Start with
pvscanwhen you suspect a VG went offline. It is fast and shows the current LVM view. - Use
pvswhen you need to see PV attributes. Thea-mflag (missing) ora--(active) tells you exactly what LVM thinks about each disk. - Reach for
lvmdiskscanwhenpvscanmisses a disk thatlsblkclearly shows. It bypasses the filter and cache, giving you ground truth.
# The diagnostic trio
pvscan              # What LVM sees right now
pvs -o pv_name,pv_attr,pv_size  # Structured view with attributes
lvmdiskscan         # Raw kernel-level scan (slow but thorough)
Debugging workflow: from symptom to fix
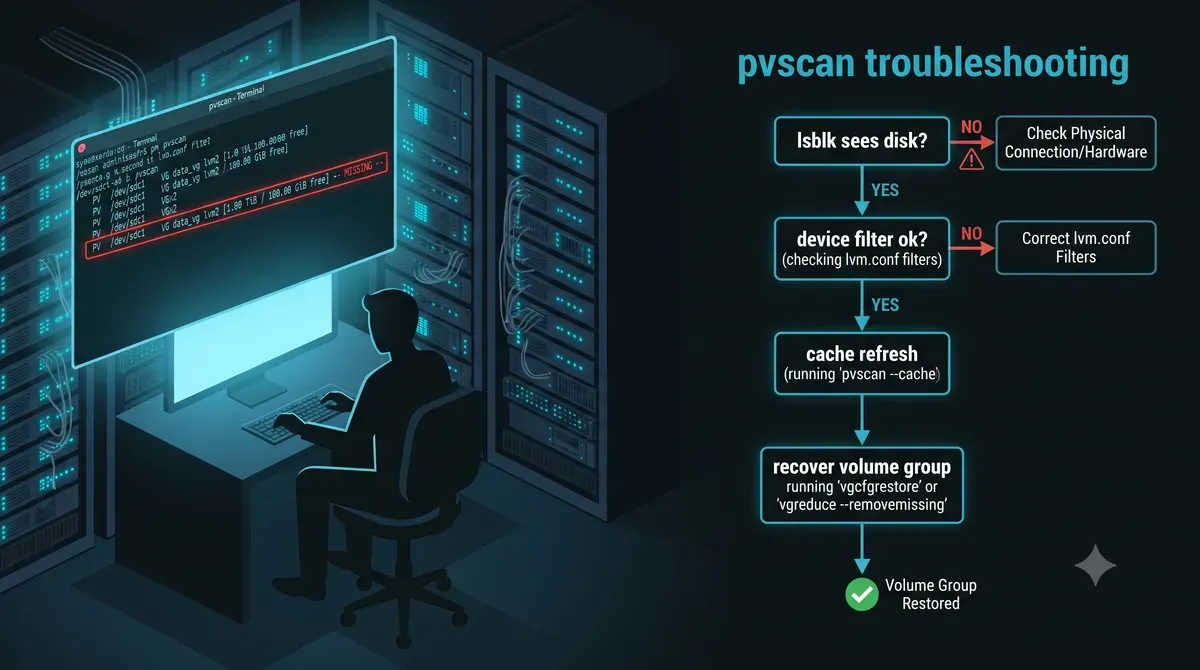
Knowing the tools is step one. Knowing the order to use them is what gets you from panic to mount in under five minutes. Here is the decision tree I follow in production.
Phase 1: confirm the gap
Run both lsblk and pvscan side by side. The output tells you which layer broke.
lsblk -o NAME,SIZE,TYPE,MOUNTPOINT
pvscan
Scenario A: lsblk shows the disk, pvscan does not. The kernel sees it, LVM does not. Jump to Phase 2.
Scenario B: Neither lsblk nor pvscan shows the disk. The kernel does not see it. The problem is physical or virtual. Rescan the bus or check the hypervisor.
Scenario C: pvscan shows the disk but the VG is still inactive. The link is restored, but LVM has not reactivated. Jump to Phase 4.
Phase 2: filter and cache
This is where 80% of problems live. Check the filter first, then the cache.
# Check if filter is blocking the device
lvmconfig devices filter
lvmconfig devices global_filter

# Check cache state
cat /etc/lvm/cache/.cache | grep -i sdc
ls -la /run/lvm/
If the filter blocks the device, edit /etc/lvm/lvm.conf and fix it. Then refresh:
pvscan --cache
pvs
If pvs now shows the disk, you are done. Move to Phase 4 to reactivate the VG.
If the filter looks correct but pvs still misses the disk, the cache is stale. Force a full rescan:
udevadm trigger
pvscan --cache
vgscan
pvs
Phase 3: deeper investigation
If Phase 2 did not work, the issue is more subtle. Use lvmdiskscan to bypass the LVM stack entirely:
lvmdiskscan | grep -i lvmIf lvmdiskscan finds the disk but pvs does not, confirm the filter one more time. Sometimes global_filter overrides filter and the fix is in the wrong file.
If even lvmdiskscan does not find the disk, check dmesg for I/O errors:
dmesg | grep -iE 'error|fail|i/o' | tail -20I/O errors at this level mean the disk itself is having problems, or the virtual disk was detached at the hypervisor level. This is hardware territory, not LVM configuration.
Phase 4: reactivate the volume group
Once pvs shows the disk with the correct VG, reactivate:
vgs                          # confirm VG status
vgchange -ay <volume-group>  # activate all LVs
lvs                          # verify LVs are active
mount /dev/<volume-group>/<logical-volume> /data
Phase 5: verify and document
After the volume is back, run a quick health check:
pvs -o pv_name,pv_attr,pv_size  # confirm PV is a-- (active)
vgs -o vg_name,vg_attr,vg_free  # confirm VG is wiz--n (writable)
df -h /data                     # confirm mount is live
dmesg | tail -5                  # confirm no new I/O errors
Then document what you found. The filter rule that caused the problem, the cache state, the exact fix. Future you will be grateful at 3 a.m.
Step 1: confirm the kernel can see the disk
Start at the bottom of the stack. If the kernel does not know the disk exists, no LVM command will help you.
lsblk
blkid
dmesg | grep -iE 'sd|nvme|error' | tail -20
lsblk shows every block device the kernel exposes. If your disk appears here with its partition, the kernel layer is healthy and you can skip to Step 2. If it does not appear at all, the problem is physical or virtual, not LVM.
In virtualized environments this happens more often than you would think. A VMware or cloud disk gets detached, then reattached, and the guest never rescans its SCSI bus. The fix is a rescan, not a reboot.
echo "- - -" > /sys/class/scsi_host/host*/scan
partprobe
Run lsblk again. When the disk shows up, move to the next layer.
Step 2: check the LVM device filter
This is the one that bites. LVM ships with a default filter that accepts the obvious devices and rejects the rest. Somewhere in your lvm.conf, a filter rule can silently exclude the exact disk you need.
The filter lives in two places. filter is the main one. global_filter is applied earlier in the pipeline, before the full LVM stack starts, and it overrides everything. Backup tools, Proxmox installations, and multipath setups are notorious for writing restrictive global_filter rules that come back to haunt you months later.
Check what LVM is actually using right now:
lvmconfig devices filter
lvmconfig devices global_filter
A typical safe filter looks like this:
filter = [ "a|/dev/sd.*|", "a|/dev/nvme.*|", "a|/dev/vd.*|", "r|.*|" ]Read it as allow all SCSI, NVMe, and virtio devices, then reject everything else. If your data disk is /dev/sdc, this filter passes it. But if someone tightened the filter to allow only sd[a-b], your /dev/sdc disappears from LVM entirely. The disk is there. The filter says no.
Here is the telltale symptom. pvscan reports fewer devices than lsblk, and the missing device follows a predictable name pattern, all sd* disks except that one, or everything under /dev/mapper/.
Fix the filter, then force LVM to re-read it:
pvscan --cacheNo reboot needed. The device filter is read every time an LVM tool starts.
Step 3: refresh the LVM cache and udev
Modern LVM keeps device metadata in /etc/lvm/cache/.cache and runtime state under /run/lvm. A stale cache can hide a device that returned to the system after an outage or a hypervisor hiccup.
Refresh everything in the right order:
udevadm trigger
pvscan --cache
vgscan
pvscan --cache tells LVM to forget what it knew and rescan from scratch. vgscan rebuilds the volume group list from the metadata it finds. If your physical volume has a known UUID, you can search for it directly:
pvs --uuid | grep -i <partial-uuid>The UUID does not change when a device name changes. That is your anchor when everything else moves.
Step 4: device renamed or behind multipath
Reboots shuffle device names. The disk that was /dev/sdb becomes /dev/sdc when another disk is added first, or when the kernel probes devices in a different order. LVM metadata records device paths, so a renamed device can make a volume group look broken even though the data is perfectly intact.
Check the persistent names:
ls -l /dev/disk/by-id/ | grep -i lvmIf the disk sits behind multipath, the physical volume lives under /dev/mapper/, and the filter from Step 2 must allow it. Multipath setups break more than any other configuration, because the default filter rejects /dev/mapper/.* and nobody notices until a path fails.
multipath -llWhatever name you find, remember this. LVM identifies physical volumes by UUID, not by path. A rename is a path problem, not a data problem.
The recovery sequence that follows
Once pvscan sees the disk again, the rest is mechanical. It is the same sequence I walked through in the LVM recovery case study, where a database server lost its data directory overnight.
pvscan
vgs
vgchange -ay <volume-group>
mount /dev/<volume-group>/<logical-volume> /data
Do not run fsck on the way. The filesystem was never the problem. The link between disk and volume group was broken, and you just fixed the link.
If pvscan still refuses to see the disk after all four steps, stop and think before doing anything destructive. Copy the LVM metadata from /etc/lvm/archive/ somewhere safe first. Then, and only then, consider vgcfgrestore or vgimportclone. Recovery is possible, but it deserves a calm head, not a rushed one.
Quick reference: matching symptoms to causes
| Symptom | Likely cause | Fix |
|---|---|---|
lsblk shows the disk, pvscan does not | Device filter excludes it | Edit filter/global_filter, run pvscan --cache |
pvscan shows nothing after VM disk reattach | No SCSI rescan in guest | echo "- - -" > /sys/class/scsi_host/host*/scan |
| Disk renamed after reboot, VG looks broken | Device path changed | Find by UUID with pvs --uuid, vgscan |
| Volume group exists but LV is inactive | PV was missing, VG deactivated | vgchange -ay <vg> then mount |
pvscan hangs or scans forever | lvmetad or cache out of sync | pvscan --cache, udevadm trigger |
Prevention: keep LVM findable
Every case I have walked through shared the same root pattern. Nobody expected the disk to disappear, so nobody had a checklist for bringing it back. A short list prevents most of the drama:
- Mount by UUID, never by
/dev/sdX. The name changes. The UUID does not. - Document the LVM layout. Volume group names, physical volumes, and which disk is which. One page of notes saves an hour of guessing.
- Review your filter rules. Every time a disk is added, ask whether the current filter would let LVM see it.
- Monitor the layer, not just the space.
df -htells you the filesystem is full.pvsandvgstell you a physical volume went missing. The second alarm is the one that matters. - Test the recovery, not just the backup. Detach a test disk in staging and run this sequence. The first time you do it should not be in production at 3 a.m.
The broader Linux survival skills, storage and process diagnosis included, are collected in my basic Linux for system administrators guide. If the disk shows up in LVM but the partition itself refuses to mount due to a damaged superblock, check out our emergency runbook on repairing corrupted Linux bad superblocks on Ext4 and XFS. The server-side hardening that keeps an attacker from turning a storage outage into a breach is covered in Linux server hardening best practices.
FAQ from the field
Does a missing disk mean my data is gone? Almost never. The data sits on the disk, and the disk is usually fine. LVM simply cannot see it, so it deactivates the volume group to protect integrity. Find the reason it cannot see the disk and the volume comes back.
Why would someone tighten the filter in the first place? To stop LVM from claiming disks it should not touch, like multipath maps, Ceph devices, or removable media. The intent is good. The execution is fragile, because a later disk addition can fall outside the rules.
Do I need to reboot after fixing the filter? No. The filter is read on every LVM command. pvscan --cache is enough to make LVM re-evaluate every device.
What if the disk really died? Then lsblk will not show it, dmesg will be full of I/O errors, and recovery moves from LVM commands to hardware replacement and pvmove on a healthy replacement. That scenario is the one covered in the LVM case study mentioned earlier.
Closing
The client’s file server came back the same morning. The fix was one line in the device filter and a pvscan --cache to make LVM forget its bad memory. Six years of archives, untouched, never lost.
The lesson stuck with me harder than the command. LVM does not hide your data to punish you. It hides it because it cannot see the disk, and the reason it cannot see the disk is almost always a small, discoverable, fixable thing. Work the pipeline from the kernel up, and the disk always shows up eventually.
I hope this pvscan troubleshooting guide helps you bring your volumes back faster than I did the first time.
Implementation Checklist
- Replicate the steps in a controlled lab before production changes.
- Document configs, versions, and rollback steps.
- Set monitoring + alerts for the components you changed.
- Review access permissions and least-privilege policies.
Official References
Need a Hand?
If you want this implemented safely in production, I can help with assessment, execution, and hardening.
Contact MeDeploy on Cloud Infrastructure with $200 Free Credit
Spin up high-performance SSD cloud Droplets, managed Kubernetes, and databases in seconds. Test your containers and production workloads with $200 in free credits.
Transparency: We independently test and operate all recommended infrastructure. If you use our partner links, you receive free promotional credits and support our testing lab at zero extra cost to you.
Weekly Production DevOps Runbooks
Join 1,000+ infrastructure engineers receiving real-world Linux troubleshooting, Proxmox clustering setups, and Docker optimization runbooks every Tuesday. Zero spam, unsubscribe anytime.

About the Author
Kamandanu Wijaya
IT Infrastructure & Network Administrator
Infrastructure & network administrator with 15+ years of enterprise experience, focused on stability, security, and automation.
Certifications: Google IT Support, Cisco Networking Academy, DevOps.
Proxmox Security: Patch Critical CVEs Without VM Downtime
next →How Long Does It Take to Learn Docker? A Realistic Timeline
Need IT Solutions?
DoWithSudo is ready to help setup servers, VPS, and your security systems.
Contact Us