How to Replace a Degraded Hard Drive in a ZFS Storage Pool
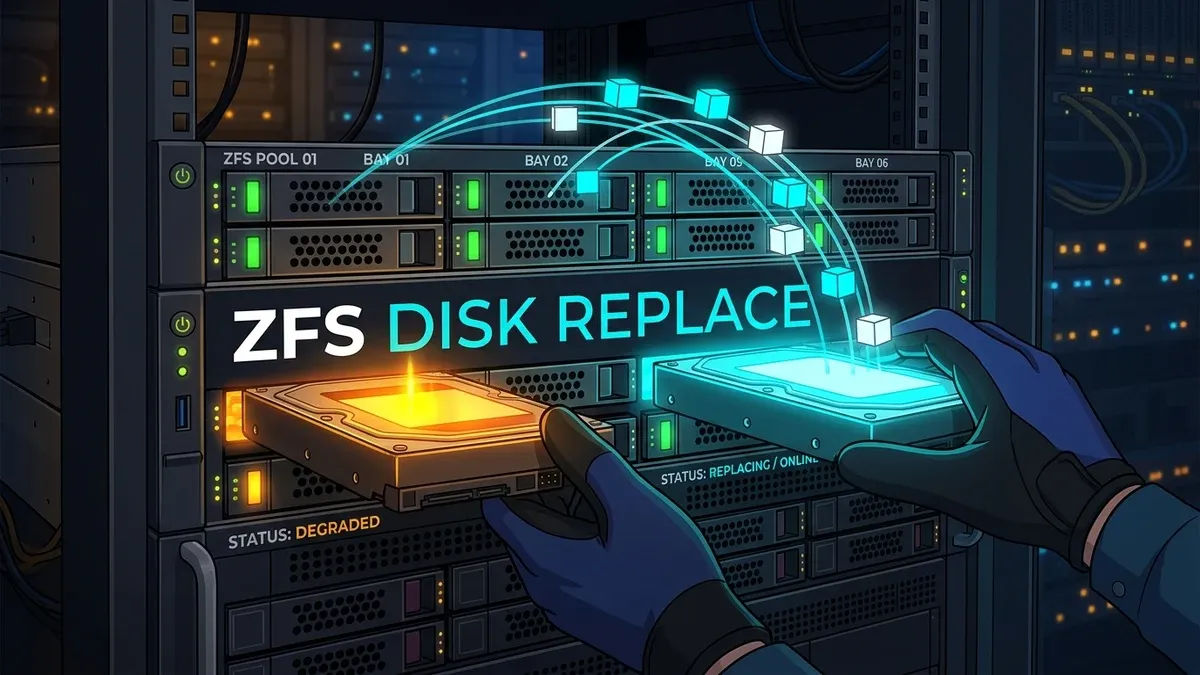
At 06:12 a monitoring alert from a client’s backup node arrived with the words I do not like reading before coffee. ZFS pool backuppool state is DEGRADED. Two minutes later a second alert confirmed the shape of the problem. One disk in a six disk RAIDZ2 vdev had accumulated 42 read errors overnight, and the pool was still serving data from the remaining five members.
The dangerous part of that morning was not the failed drive. It was the drive bay numbering. The chassis had sixteen bays in four rows, the label on the front panel did not match the order the kernel enumerated them, and the technician who arrived to swap the disk had already unplugged a healthy member before I stopped him on a video call. zpool status and lsblk do not agree on device names, serial numbers are on the label, and one wrong pull in a RAIDZ1 vdev turns a degraded pool into a pool with no redundancy at all.
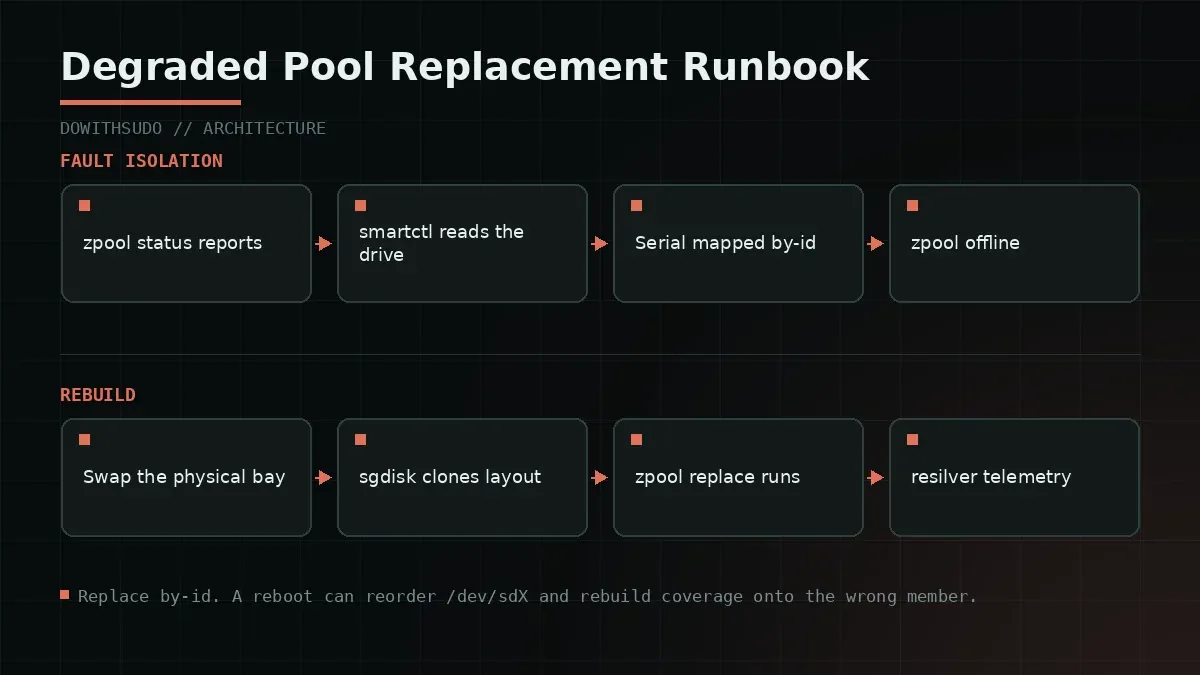
This is the runbook I use now. It starts with reading the failure properly, identifies the drive by serial number rather than device node, and finishes with a resilver that does not starve the production VMs sharing those disks.
Read the Failure Before You Touch Hardware
zpool status gives you the pool level view. Add -v to include error detail, and add -x when you want a compact summary you can paste into a ticket.
zpool status -v backuppool pool: backuppool
state: DEGRADED
status: One or more devices are faulted in response to persistent errors.
Sufficient replicas exist for the pool to continue functioning in a
degraded state.
action: Replace the faulted device, or use 'zpool clear' to mark the device
repaired.
scan: scrub repaired 0B in 0 days 04:12:39 with 0 errors on Sun Sep 20 04:12:41 2026
config:
NAME STATE READ WRITE CKSUM
backuppool DEGRADED 0 0 0
raidz2-0 DEGRADED 0 0 0
ata-WDC_WD80EFAX-68LHPN0_7SH0ABCD ONLINE 0 0 0
ata-WDC_WD80EFAX-68LHPN0_7SH0KLMN ONLINE 0 0 0
1a2b3c4d-9e8f-4a1b-8c2d-5e6f7a8b9c0d FAULTED 42 0 0
ata-WDC_WD80EFAX-68LHPN0_7SH0PQRS ONLINE 0 0 0
ata-WDC_WD80EFAX-68LHPN0_7SH0TUVW ONLINE 0 0 0
ata-WDC_WD80EFAX-68LHPN0_7SH0XYZ1 ONLINE 0 0 0Read the three counters in order. A high READ count with zero WRITE and zero CKSUM means the drive returned data it could not deliver correctly and the pool recovered it from parity. If CKSUM is elevated on multiple members, the problem may be a cable, a backplane, or a controller rather than the disk, and replacing a drive will not fix it.
Then confirm with SMART. A single bad read can be a transient bus error, while a growing reallocated sector count is a disk on its way out.
sudo smartctl -a /dev/sdc | grep -Ei 'reallocated|pending|uncorrect|udma|crc|temp|power_on'| Attribute | Threshold that matters | Interpretation |
|---|---|---|
Reallocated_Sector_Ct | Above 0 and rising between checks | Physical media damage |
Current_Pending_Sector | Above 0 | Unreadable sectors awaiting remap |
Offline_Uncorrectable | Above 0 | Failing read during self test |
UDMA_CRC_Error_Count | Any increase | Cable or backplane, not the platter |
Power_On_Hours | Context only | An old drive swapping into a young array |
Temperature | Above 55 C sustained | Cooling problem that will kill the replacement too |
On NVMe devices the attribute names differ, and smartctl -a -d nvme /dev/nvme0 exposes Media and Data Integrity Errors plus Percentage Used. A percentage used above 90 percent with integrity errors is a drive to retire, and the replacement plan should account for the rest of the batch reaching that point at a similar rate.
Identify the Disk by Serial, Never by Device Node
Device nodes move. A reboot, a backplane reorder, or a hot swap can turn sdc into sdd, and if you run zpool offline against the wrong node you have taken a healthy member out of the pool. ZFS stores enough metadata to survive this, but your maintenance window does not.
Use the by-id symlinks, which encode the model and serial, and the by-path links, which encode the physical port.
ls -l /dev/disk/by-id/ | grep 'WD80EFAX'
ls -l /dev/disk/by-path/ | grep -i pci
sudo udevadm info --query=all --name=/dev/sdc | grep -Ei 'ID_SERIAL|ID_PATH|DEVPATH'
ID_SERIAL=WDC_WD80EFAX-68LHPN0_7SH0PQRS
ID_PATH=pci-0000:03:00.0-sas-phy2-lun-0Now map that to a physical bay. On a server with an enclosure management interface, ledctl can blink the activity LED on a specific slot.
sudo ledctl locate=/dev/disk/by-id/ata-WDC_WD80EFAX-68LHPN0_7SH0PQRS
# Turn the locator off once the technician confirms the right bay.
sudo ledctl locate_off=/dev/disk/by-id/ata-WDC_WD80EFAX-68LHPN0_7SH0PQRS
If no LED control is available, cross reference the by-path value against the backplane topology in the server manual, and write the mapping into a spreadsheet once. Every future replacement on that chassis becomes a lookup instead of an investigation.
Runbook: Offline, Swap, Replace, Resilver
The sequence below keeps the pool redundant at every step. Do not skip the offline step, because ZFS needs to know the drive is leaving before the kernel starts reporting I/O errors for a device that no longer exists.
# 1. Confirm the current state and that no scrub is running.
zpool status -x backuppool
zpool status -v backuppool | grep -i scrub

# 2. Take the failing member offline using its by-id path.
zpool offline backuppool /dev/disk/by-id/ata-WDC_WD80EFAX-68LHPN0_7SH0PQRS
zpool status backuppool

# 3. Physically swap the drive in the identified bay.
#    Verify the locator LED, then remove and insert with the chassis powered.

# 4. Identify the new device and confirm it is the right size.
lsblk -o NAME,SIZE,SERIAL,MODEL,TYPE /dev/sdd
ls -l /dev/disk/by-id/ | grep 'NEWSERIAL'

# 5. Replicate the partition layout from a surviving member.
sudo sgdisk --backup=/root/zfs-member.gpt /dev/disk/by-id/ata-WDC_WD80EFAX-68LHPN0_7SH0ABCD
sudo sgdisk --zap-all /dev/disk/by-id/ata-WDC_WD80EFAX-68LHPN0_NEWSERIAL
sudo sgdisk --load-backup=/root/zfs-member.gpt /dev/disk/by-id/ata-WDC_WD80EFAX-68LHPN0_NEWSERIAL
sudo sgdisk -G /dev/disk/by-id/ata-WDC_WD80EFAX-68LHPN0_NEWSERIAL

# 6. Replace the offline member with the new device.
zpool replace backuppool \
  /dev/disk/by-id/ata-WDC_WD80EFAX-68LHPN0_7SH0PQRS \
  /dev/disk/by-id/ata-WDC_WD80EFAX-68LHPN0_NEWSERIAL

# 7. Watch the resilver progress.
zpool status -v backuppool
watch -n 5 'zpool status backuppool | grep -E "resilver|scan"'
The sgdisk -G step matters. It randomizes the disk and partition GUIDs so the new member does not carry identifiers that duplicate the surviving members. Without it, some configurations report duplicate GUID warnings, and a future zpool import on a cloned set of disks becomes ambiguous.
If the replacement drive is larger than the original, the extra capacity is not usable inside a RAIDZ vdev until every member is upgraded. Note the size difference and plan the full set upgrade rather than expecting instant growth.
Tuning Resilver So the Guests Stay Alive
A resilver is a full read of every surviving member with parity reconstruction written to the new disk. On a pool that also serves VM disks, the rebuild competes directly with guest I/O, and the default throttling is conservative enough that a 8 TB drive can take a day.
Two tunables change the balance. zfs_resilver_min_time_ms controls how long a resilver pass works before yielding, and raising it lets the rebuild use more I/O bandwidth per cycle. zfs_scan_min_time_ms does the same for scrub.
# Apply for the current boot and observe the effect on guest latency.
echo 5000 | sudo tee /sys/module/zfs/parameters/zfs_resilver_min_time_ms
echo 5000 | sudo tee /sys/module/zfs/parameters/zfs_scan_min_time_ms
echo 10 | sudo tee /sys/module/zfs/parameters/zfs_resilver_delay

# Persist across reboots.
cat | sudo tee /etc/modprobe.d/zfs.conf <<'EOF'
options zfs zfs_resilver_min_time_ms=5000
options zfs zfs_scan_min_time_ms=5000
options zfs zfs_resilver_delay=10
EOF
sudo update-initramfs -u -k all
Watch both sides of the trade. The resilver should finish faster, and guest latency should not visibly degrade. If the VMs start reporting timeouts, lower the values rather than pushing them higher, because a rebuild that finishes in eight hours is still better than a production outage that lasts two.
# Throughput and remaining work during a resilver.
zpool iostat -v backuppool 5
cat /proc/spl/kstat/zfs/backuppool/scan
The scan kstat file shows bytes issued and the function currently running. If it sits at the same value for minutes, the resilver is throughput limited by the disks rather than by the tunable, and there is nothing to gain from pushing further.
ZFS also supports deferring resilvers when the pool’s redundancy is at risk. The zfs_resilver_disable_defer parameter defaults to 0 in recent OpenZFS, which means a resilver is postponed while a pool has no redundancy left. On a degraded RAIDZ2 with one faulted member, that deferral would be a mistake, and you should verify the current behaviour before relying on it.
Failure Modes and Troubleshooting
1. The wrong disk was removed
Symptom: zpool status shows two faulted members, one removed by mistake and one genuinely failing.
zpool status -v backuppool
lsblk -o NAME,SERIAL,SIZE,TYPE,MOUNTPOINT
If redundancy remains, reinsert the healthy drive from the correct bay, run zpool online backuppool <by-id> and let it rejoin. ZFS will resilver it back. If a RAIDZ1 vdev has lost two members, the pool is faulted and you are in restore from backup territory, which is why the by-id discipline in this runbook exists.
2. Resilver restarts repeatedly after a reboot
Symptom: each zpool status reports a small percentage of a resilver that never completes, with the counter resetting after each restart.
journalctl -k | grep -i 'zfs\|ata.*error' | tail -40
smartctl -a /dev/sdd | grep -Ei 'udma|crc'
A restarting resilver usually means the pool is seeing intermittent errors on a surviving member, often from a marginal cable or a backplane that was disturbed during the swap. Fix the cabling before you continue, because a resilver that keeps restarting puts continuous load on an already stressed array.
3. zpool replace fails with a device busy error
Symptom: cannot replace ... with ...: device is in use while the new disk shows no partitions holding data.
sudo swapoff -a
sudo sgdisk --zap-all /dev/disk/by-id/<new>
sudo partprobe /dev/disk/by-id/<new>
A leftover swap partition or an automatically assembled array from a previous life is the usual cause. Wiping the partition table and re-probing fixes both. If the new device was previously part of an LVM volume group, run pvremove against it first, following the same identification discipline described in our guide to a missing physical volume in pvscan.
Production Verification Checklist
| Check | Command | Expected |
|---|---|---|
| Pool state restored | zpool status -x backuppool | all pools are healthy |
| Resilver completed | zpool status | resilvered ... with 0 errors |
| No lingering errors | zpool status -v | grep -A5 config | Read, write, cksum all zero |
| New member by-id | zpool status device name | ata-... with new serial |
| Error counters cleared | zpool clear backuppool then zpool status | Zero counters |
| SMART clean on new disk | smartctl -a <new> | No reallocated or pending sectors |
| Resilver tunables persisted | grep zfs_resilver /etc/modprobe.d/zfs.conf | Present |
| Guest latency normal | VM latency or zpool iostat -v | Comparable to pre incident |
| Alert cleared | monitoring dashboard | Pool state healthy |
| Record updated | maintenance log | Bay, serial, date, drive model |
Add a periodic zpool scrub to your calendar as well, monthly on pools that serve active VMs and more often on arrays holding backups. A scrub catches silent corruption between failures, which is the failure mode that turns two independent problems into data loss. If you are still deciding between ZFS and other storage backends for a Proxmox node, the parity and integrity behaviour compared in ZFS vs Btrfs on Linux is the relevant section. And when the pool is part of a hypervisor deployment, the surrounding choices about which datasets live on ZFS and which belong on Ceph or LVM-Thin are covered in Proxmox storage architecture.
Closing Thoughts
A degraded pool is not an emergency. It is a warning with a deadline attached, and the deadline is the moment the next member fails. Everything that makes the repair smooth happens before the failure, in the labels on the chassis, the by-id mapping in a spreadsheet, and the offline step nobody skips.
The habit I recommend is boring and takes twenty minutes. On every ZFS host you manage, record the serial number of each member, the bay it lives in, and the by-id path it uses. Print it and tape it inside the chassis door. Then the next technician who opens that server has the same chance I did not give mine, to pull the right disk on the first attempt.
Implementation Checklist
- Replicate the steps in a controlled lab before production changes.
- Document configs, versions, and rollback steps.
- Set monitoring + alerts for the components you changed.
- Review access permissions and least-privilege policies.
Official References
Need a Hand?
If you want this implemented safely in production, I can help with assessment, execution, and hardening.
Contact MeNeed an Offsite Backup Node or Corosync QDevice?
Deploy an independent cloud Droplet to act as a lightweight Corosync QDevice tiebreaker, remote PBS backup sync relay, or isolated test environment with $200 in free credits.
Transparency: We independently test and operate all recommended infrastructure. If you use our partner links, you receive free promotional credits and support our testing lab at zero extra cost to you.
Weekly Production DevOps Runbooks
Join 1,000+ infrastructure engineers receiving real-world Linux troubleshooting, Proxmox clustering setups, and Docker optimization runbooks every Tuesday. Zero spam, unsubscribe anytime.

About the Author
Kamandanu Wijaya
IT Infrastructure & Network Administrator
Infrastructure & network administrator with 15+ years of enterprise experience, focused on stability, security, and automation.
Certifications: Google IT Support, Cisco Networking Academy, DevOps.
Docker Compose in Production: Reverse Proxy and Secrets
next →Proxmox ZFS Native Encryption: Setup, Keyload, and Unlock
Need IT Solutions?
DoWithSudo is ready to help setup servers, VPS, and your security systems.
Contact Us