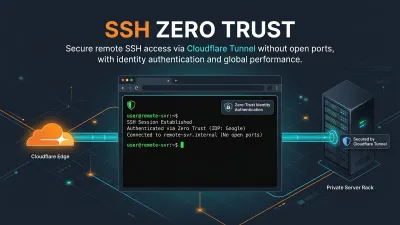
Cloudflare Tunnel vs Tailscale Subnet Router for Homelabs
[ info ] // Meta
Category
NetworkingA guest blog author asked me for access to a staging environment so they could verify their screenshots. The simplest answer was to point a cloudflared ingress rule at the admin panel of a headless CMS and send them a hostname. It took four minutes. Six weeks later a security researcher emailed me because that hostname was still live, still running a CMS admin login with no Access policy attached, and still responding to anyone who found it in a certificate transparency log.
What made that embarrassing was that the same network already had a Tailscale subnet router advertising the whole /24. The author could have joined the tailnet and reached the panel over the routed address. Instead I reached for the tool that produces a public URL because I was thinking about the hostname I wanted to share rather than the network I already had.
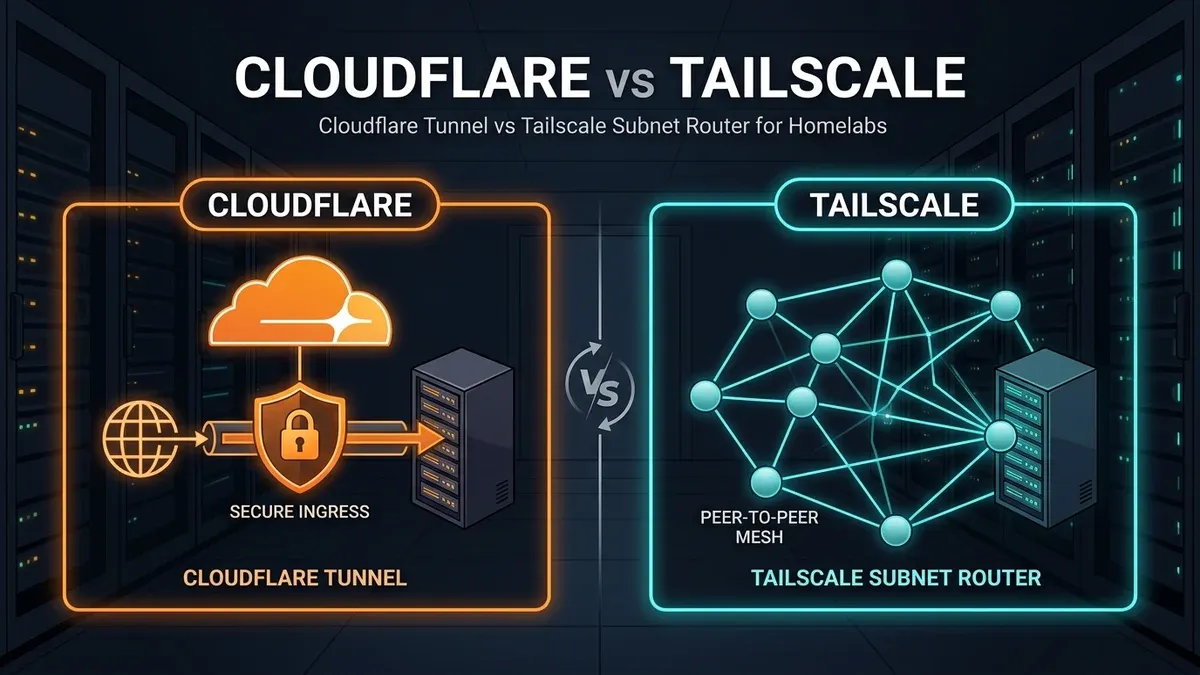
Both tools solve remote access, and picking between them is not a question of which is better. It is a question of what the remote party needs to reach, how much you trust their device, and whether the resource should exist at a public address at all.
Layer 7 Ingress vs Layer 3 Overlay
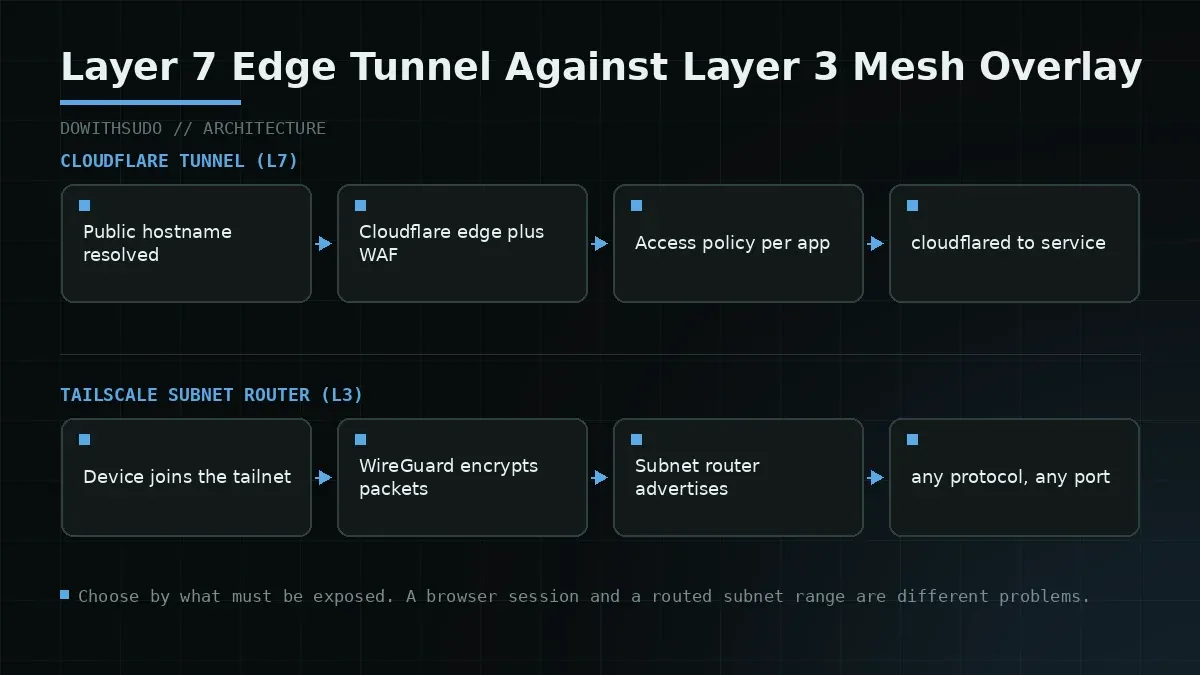
The two architectures operate at different layers, and that difference explains almost every practical outcome.
Cloudflare Tunnel runs a daemon on your host that dials outbound to Cloudflare’s edge. Users reach a hostname, Cloudflare terminates TLS, evaluates an Access policy, and forwards the request down the existing connection to a service you nominated in config.yml. The public DNS record points at Cloudflare, never at your origin. Your router needs no inbound rule, and the service is reachable by any browser on the internet as long as the policy allows the identity.
Tailscale builds an overlay network. Each device joins a tailnet, receives a stable address in the 100.64.0.0/10 range, and exchanges WireGuard encrypted packets with peers directly when NAT traversal succeeds. A subnet router extends that reach to devices that cannot install the client, by advertising a route such as 192.168.1.0/24 into the tailnet. Nothing is published to the public internet, and a device that has not joined the tailnet cannot reach anything.
| Dimension | Cloudflare Tunnel (L7) | Tailscale subnet router (L3) |
|---|---|---|
| Client requirement | Browser or cloudflared | Tailscale client installed |
| Protocols | HTTP, HTTPS, SSH, RDP, generic TCP | Any IP protocol, including UDP and ICMP |
| Address model | Per hostname | Per device, plus routed subnets |
| Edge termination | TLS terminates at Cloudflare | End to end through WireGuard |
| Access control | Identity policy per application | Node and port ACLs |
| Public exposure | Hostname exists publicly | Nothing published |
| Free tier feel | Generous, per user seats matter | Generous, device and user counts matter |
| Failure symptom | Error 1033 or 502 | Traffic falls back to a relay |
The protocol row is where people get surprised. A tunnel can carry UDP and arbitrary TCP if you configure it that way, and a subnet router carries everything by definition. If your workload is an admin panel, a tunnel is a precise tool. If your workload is SMB, mDNS discovery, a game server, or a database client that insists on a raw connection, the overlay is the honest answer.
Benchmarking What Actually Matters
Published throughput numbers are close to useless without the measurement conditions, so here is mine. Lab hardware is a Proxmox host at home with a 300 Mbit symmetric fibre link, an iperf3 server on a VM, a laptop on a 200 Mbit connection in a different city, and both tools configured to carry the same traffic.
# Tailscale path: laptop to VM over the tailnet.
tailscale ping srv-lab --until-direct --timeout 10s
iperf3 -c 100.x.y.z -t 30 -P 4

# Cloudflare Tunnel path: for HTTP workloads, measure the full request path.
curl -o /dev/null -s -w 'connect %{time_connect} tls %{time_appconnect} ttfb %{time_starttransfer}\n' \
https://lab.dowithsudo.com/health| Scenario | Direct path | Relayed path |
|---|---|---|
| Tailscale, direct WireGuard | 268 Mbit/s | Not applicable |
| Tailscale via DERP relay | 42 Mbit/s | 118 ms added RTT |
| Cloudflare Tunnel, HTTP | 251 Mbit/s | Edge adds 9 to 18 ms RTT |
| Cloudflare Tunnel, SSH session | Subjective latency fine | Feels local under 60 ms |
Two conclusions came out of that table. First, a direct WireGuard path is roughly as fast as the raw connection, because there is no relay in the middle. Second, when NAT traversal fails and Tailscale falls back to a DERP relay, throughput collapses by a factor of six and latency jumps by more than a hundred milliseconds. That fallback is not rare on carrier grade NAT or on mobile networks that block UDP.
tailscale status | grep -Ei 'relay|direct'
tailscale netcheck
netcheck prints the NAT type for your network and tells you whether UDP is being filtered upstream. If your ISP blocks outbound UDP 41641, every session goes through a relay, and the throughput table above becomes the number you live with. That is the single most common reason someone concludes Tailscale is slow.
Measure the path, not the product. A relayed mesh network is slower than a tunnel, and a direct mesh network is faster than either.
Authentication and Exposure Models
Cloudflare Access evaluates identity per application. You attach a policy to a hostname, choose an identity provider, and decide whether the session lives for an hour or a week. The user does not need to install anything, and an unauthenticated request never reaches your origin. The cost is that the hostname exists in public DNS, which means certificate transparency logs, DNS history databases, and opportunistic scanners can all learn that it is there. Policy is the only thing standing between that knowledge and your service.
Tailscale authorises devices and users at the tailnet level, with ACLs written in a policy file that maps users and groups to nodes and ports. The user experience is a client install and a login, after which internal services feel like local ones. The critical distinction is that a device on the tailnet is trusted at the network layer. If a laptop joins the tailnet and is later compromised, the attacker inherits whatever the ACL grants that device, and there is no per application prompt to slow them down.
For a homelab, that leads to a simple rule I now follow. Public websites and deliberately shared services go behind a tunnel with an Access policy. Everything else joins the tailnet and is reached by address. The only exception is a service that cannot be re-authenticated per session and must be reachable from a device I do not control, and those cases deserve a service account and a narrow ACL.
DNS is where the two systems touch. With a subnet router, clients resolve internal names through your local resolver, so nas.lan and the tailnet address coexist. Cloudflare Tunnel needs the hostname in public DNS, and split horizon setups, where the same name resolves to a LAN address internally and a Cloudflare address externally, work but add a moving part that breaks whenever a resolver is misconfigured.
# Force MagicDNS and verify what the tailnet resolves.
tailscale dns status
dig +short nas.lan @100.100.100.100
Decision Matrix
| Workload | Better fit | Why |
|---|---|---|
| Public marketing site | Cloudflare Tunnel | Needs a public hostname and edge caching |
| Internal admin dashboard | Cloudflare Tunnel plus Access | Clientless, per identity policy |
| PostgreSQL or MySQL admin | Tailscale | Raw protocol, per device ACL |
| SSH from a borrowed laptop | Cloudflare Tunnel | Browser terminal, no install |
| SSH from your own devices | Tailscale | Native terminal, no third party |
| SMB and mDNS discovery | Tailscale | Broadcast and discovery traffic |
| Game server or voice | Tailscale | UDP with throughput sensitivity |
| Webhook receiver | Cloudflare Tunnel | Must be reachable by third parties |
| CI runners reaching internal APIs | Tailscale | Long lived machine auth, no browser |
| Uptime monitor | Cloudflare Tunnel | Public by definition |
The matrix is not a verdict on either product. It is an admission that a homelab usually needs both, and that mixing them deliberately is cheaper than stretching one to cover the other.
Failure Modes and Troubleshooting
1. A tunnel hostname survives with no policy attached
Symptom: a hostname you created for a demo still resolves and serves content months later.
cloudflared tunnel list
cloudflared tunnel info staging-demo
curl -sI https://staging-demo.dowithsudo.com | head -3
Delete the ingress rule and the DNS record, not just the local config. A tunnel with an ingress rule that returns http_status:404 for unmatched hostnames limits the damage, which is why every config file in my fleet ends with that catch-all.
2. Tailnet traffic silently relays through DERP
Symptom: file transfers between two machines on the same LAN take minutes.
tailscale status --json | grep -o '"Relay":"[^"]*"'
tailscale debug derp-map
Check netcheck first, then confirm that no firewall rule on either host drops outbound UDP. On some routers, enabling UPnP or NAT-PMP for the tailnet interface restores direct paths. If your ISP genuinely blocks UDP, a personal DERP relay in a nearby region is the practical workaround.
3. ACL changes lock you out of your own tailnet
Symptom: after editing the policy file, your laptop can reach nothing, and tailscale ping fails for every peer.
Keep one rule at the top of the ACL for your own devices or a group that contains your admin account, and always test with the ACL preview tooling before saving. If you lock yourself out completely, the recovery path is to log in to the admin console from a browser session that is not on the affected device and revert the policy.
4. Split horizon DNS breaks internal access
Symptom: an internal name resolves to the Cloudflare edge address from inside the LAN, and traffic takes a long round trip out and back.
dig +short app.dowithsudo.com
dig +short app.dowithsudo.com @192.168.1.1
Either move internal access to the tailnet name entirely, or fix the resolver so the internal view wins for LAN clients. Two answers for the same record is a configuration that will confuse the next person who debugs it.
Verification Checklist
| Check | Command | Expected |
|---|---|---|
| Tunnel hostnames intentional | cloudflared tunnel list | Only live services |
| Catch-all rule present | tail -1 /etc/cloudflared/config.yml | http_status:404 |
| Every hostname has a policy | Zero Trust dashboard | One policy minimum |
| Direct mesh paths | tailscale status | grep direct | Direct, not relay |
| NAT type acceptable | tailscale netcheck | UDP not filtered |
| Subnet routes approved | Admin console | Route enabled and approved |
| ACL admin rule first | ACL policy file | Admin group listed first |
| Internal DNS view correct | dig from LAN | LAN address |
| Public DNS audit | CT log search | No forgotten hostnames |
The last row is the one I now run quarterly. Searching certificate transparency logs for your own domain is the fastest way to find a hostname that outlived the project it was created for, and it takes five minutes.
Closing Thoughts
The mistake in the opening story was not picking the wrong tool. It was reaching for the tool that produces a shareable URL in a network that already had a better path, and then not removing the URL. Tunnels excel at publishing a small number of services to a large number of identities. Subnet routers excel at connecting a small number of trusted devices to everything else. Most homelabs need both, and the discipline is in deciding which service gets published.
If you want the deeper comparison of mesh clients themselves, the performance and relay behaviour of the two major WireGuard implementations is covered in WireGuard vs Tailscale, and the tunnel side of this article pairs with the ingress and port handling details in Cloudflare Tunnel ports explained. Patch the hosts on both ends of whichever design you pick, because the hypervisor is the same attack surface whether the traffic arrives publicly or over an overlay, as our Proxmox CVE patching runbook describes.
Implementation Checklist
- Replicate the steps in a controlled lab before production changes.
- Document configs, versions, and rollback steps.
- Set monitoring + alerts for the components you changed.
- Review access permissions and least-privilege policies.
Official References
Need a Hand?
If you want this implemented safely in production, I can help with assessment, execution, and hardening.
Contact MeDeploy on Cloud Infrastructure with $200 Free Credit
Spin up high-performance SSD cloud Droplets, managed Kubernetes, and databases in seconds. Test your containers and production workloads with $200 in free credits.
Transparency: We independently test and operate all recommended infrastructure. If you use our partner links, you receive free promotional credits and support our testing lab at zero extra cost to you.
Weekly Production DevOps Runbooks
Join 1,000+ infrastructure engineers receiving real-world Linux troubleshooting, Proxmox clustering setups, and Docker optimization runbooks every Tuesday. Zero spam, unsubscribe anytime.

About the Author
Kamandanu Wijaya
IT Infrastructure & Network Administrator
Infrastructure & network administrator with 15+ years of enterprise experience, focused on stability, security, and automation.
Certifications: Google IT Support, Cisco Networking Academy, DevOps.
Docker Rootless Mode: Setup, Limitations, and Production
next →Cloudflare Tunnel SSH via Web Browser and Cloudflared Client
Need IT Solutions?
DoWithSudo is ready to help setup servers, VPS, and your security systems.
Contact Us