Cloudflare Tunnel SSH via Web Browser and Cloudflared Client
[ info ] // Meta
Category
NetworkingA 4 vCPU cloud instance behind a fresh public IP collected 118,000 failed SSH logins in twelve hours. I know the number because I read it straight out of auth.log while the instance was still warm from provisioning, before we had moved it behind our standard access path. The instance had no service running except sshd, no DNS record pointing at it, and still the scanners found it within seventeen minutes of the address being assigned. That is the part people underestimate. Scan coverage of the public IPv4 space runs continuously and it does not care whether anyone published a link to your host.
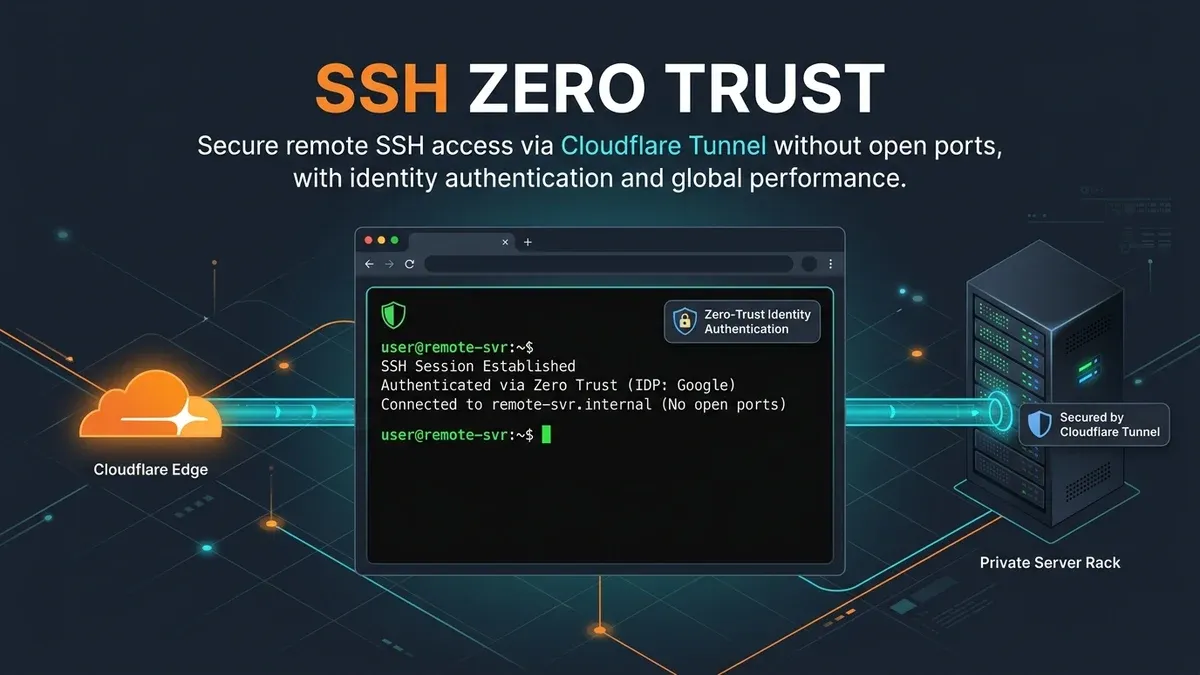
The usual fixes are a non-standard port, key-only authentication, and a firewall allowlist. Each one helps, and all three share the same assumption. Something is still listening on a public interface and the defence is a rule that decides who may connect. Cloudflare Tunnel inverts that assumption. Nothing listens publicly, and access becomes an identity decision evaluated at Cloudflare’s edge before a single packet reaches your host.
This is the setup I now use for every server that does not need SSH exposed to the whole internet, including the browser-rendered terminal for engineers without a laptop, and the native cloudflared access ssh path for those who refuse to give up their terminal.
What Changes When the Tunnel Is Outbound Only
cloudflared is a daemon that opens outbound connections to Cloudflare’s edge and keeps them alive. Traffic addressed to a hostname you control flows down those connections to the daemon, which forwards it to whatever local service you configured. Because the connection originates from the server, your firewall needs zero inbound rules. Port 22 stays closed at the edge router, on the cloud firewall, and inside the host’s own iptables ruleset.
The diagram below shows the two layers involved, the identity layer that decides whether a request may exist, and the transport layer that carries an approved session to sshd.
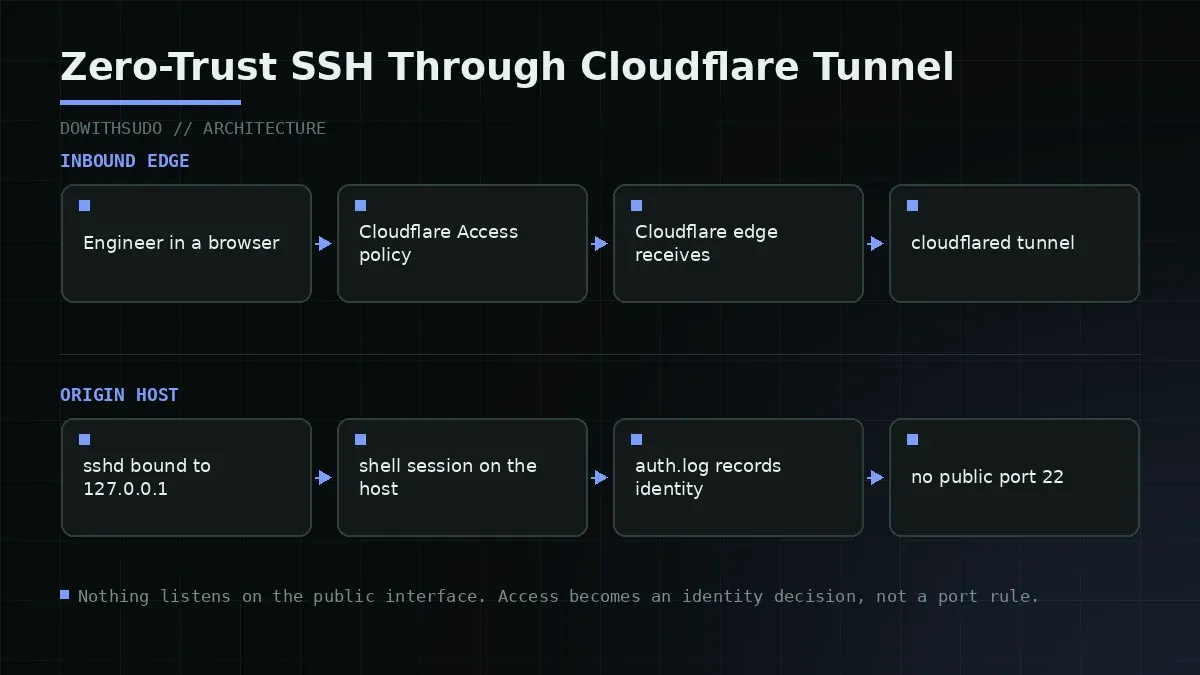
There are three properties worth naming, because they explain the failure modes later.
- The tunnel is stateful. If the daemon dies, the hostname returns a Cloudflare error page rather than timing out silently.
- Access policy evaluation happens before the origin sees anything. A blocked user never reaches
sshd, so their attempts never appear inauth.log. - The origin sees a connection from
127.0.0.1. Source IP based rules on the host become meaningless, so all authorisation must move to the edge.
That last point is the one that surprises people mid migration. If you have sshguard, fail2ban, or an iptables rule that permits only your office range, those controls stop seeing real client addresses. You will need to decide which layer owns authorisation before you cut over, not after.
Step 1: Publish the SSH Service Through cloudflared
Start on the server that runs sshd. Install cloudflared from Cloudflare’s repository, then authenticate the daemon.
# Debian 12 or Ubuntu 22.04+
curl -fsSL https://pkg.cloudflare.com/cloudflare-main.gpg \
  | sudo tee /usr/share/keyrings/cloudflare-main.gpg >/dev/null
echo "deb [signed-by=/usr/share/keyrings/cloudflare-main.gpg] \
https://pkg.cloudflare.com/cloudflared any main" \
  | sudo tee /etc/apt/sources.list.d/cloudflared.list
sudo apt update && sudo apt install -y cloudflared

# Create the tunnel and write credentials to /etc/cloudflared/
sudo cloudflared tunnel login
sudo cloudflared tunnel create ssh-edge
The create command prints a tunnel UUID and writes /etc/cloudflared/<uuid>.json. That file is a credential. Treat it like an SSH private key and keep it out of any repository.
Now write the tunnel configuration. The ingress list is evaluated top to bottom, so the SSH hostname rule must come before the catch-all.
# /etc/cloudflared/config.yml
tunnel: ssh-edge
credentials-file: /etc/cloudflared/9f2c1a44-6b3e-4d21-8a77-1c0e5b2d4f88.json

originRequest:
  connectTimeout: 30s
  noTLSVerify: false

ingress:
  - hostname: ssh.dowithsudo.com
    service: ssh://localhost:22
  - hostname: git.dowithsudo.com
    service: http://localhost:3000
  - service: http_status:404
Two settings in that file carry more weight than they look. connectTimeout: 30s gives sshd room to complete its banner exchange on a slow link, and the trailing http_status:404 rule guarantees that any hostname pointed at this tunnel without an explicit rule returns a refusal instead of falling through to some other service. If you run multiple hostnames on one daemon, the ingress patterns are worth reading in full in the Cloudflare Tunnel ports reference at tunnel ports explained.
Publish the hostname and start the service.
sudo cloudflared tunnel route dns ssh-edge ssh.dowithsudo.com
sudo cloudflared service install
sudo systemctl enable --now cloudflared
sudo systemctl status cloudflared --no-pager
● cloudflared.service - cloudflared
Active: active (running) since Mon 2026-09-22 03:14:07 WIB
Process: 2114 ExecStart=/usr/bin/cloudflared --no-autoupdate --config /etc/cloudflared/config.yml tunnel run
Main PID: 2114 (cloudflared)
Connections: 4 active edge connectionsFour active connections is the healthy default. Two would still work, one means you are running without redundancy, and zero means the daemon registered but never established a data path.
Step 2: Close the Door on Port 22
The tunnel is useless if sshd still accepts connections from the internet. Bind it to loopback and keep the tunnel as the only path in.
# /etc/ssh/sshd_config.d/99-local-only.conf
ListenAddress 127.0.0.1
PasswordAuthentication no
PermitRootLogin no
PubkeyAuthentication yes
AllowUsers deploy ops-readonly
ClientAliveInterval 300
ClientAliveCountMax 2
sudo sshd -t && sudo systemctl reload ssh
sudo ss -tlnp | grep -E ':22\b'LISTEN 0 128 127.0.0.1:22 0.0.0.0:* users:(("sshd",pid=982,fd=3))If that output shows 0.0.0.0:22 or [::]:22, a drop-in earlier in the include order is overriding your file. Files in sshd_config.d/ are read in lexical order, so name yours 99- and confirm with sshd -T | grep listenaddress.
While you are in the host’s SSH configuration, the broader baseline matters more than any single directive. The list I apply to every new node lives in the Linux server hardening checklist at hardening best practices, and it pairs well with this change.
Closing the port is the security decision. Everything else in this article is convenience layered on top of it.
Step 3: Put an Identity Policy in Front
In the Cloudflare Zero Trust dashboard, create a self-hosted application for the hostname, then attach at least one policy. The shape I use for production servers is two policies: one group-based rule for engineers, one break-glass rule for a single account with email OTP and a short session.
| Setting | Value | Reason |
|---|---|---|
| Application type | Self-hosted, browser rendered | Enables the web terminal |
| Session duration | 8 hours | One work shift, no endless sessions |
| Identity provider | Google Workspace SSO | MFA inherited from the IdP |
| Policy 1 | Access group sre-oncall | Routine operations |
| Policy 2 | Email OTP, single account | Break glass when the IdP is down |
| Browser rendering | Enabled | Terminal without local tooling |
Policies are evaluated in order and the first match wins, so put the narrower rule above the wider one. Session duration is worth thinking about honestly. A twelve hour session on a database host means a stolen laptop keeps working through the night, while a one hour session means your on-call engineer re-authenticates during an incident. Eight hours is the compromise I have settled on, with the break-glass account set to one hour.
Step 4: Browser Terminal and Native CLI Access
With browser rendering enabled, visiting https://ssh.dowithsudo.com after authentication opens a terminal in the page. No client software, no key distribution, and the workspace survives a laptop swap because the credential is the SSO session.
For engineers who want their real terminal, configure the client side once.
# ~/.ssh/config on the workstation
Host ssh-edge
    HostName ssh.dowithsudo.com
    User deploy
    ProxyCommand cloudflared access ssh --hostname %h
    ServerAliveInterval 30
# Optional: issue a short-lived certificate so the command skips the browser flow
cloudflared access ssh-gen --hostname ssh.dowithsudo.com
ssh -o ProxyCommand="cloudflared access ssh --hostname %h" deploy@ssh.dowithsudo.comShort-lived certificates are the better default for humans. They expire on their own, they are scoped to one hostname, and they remove the temptation to copy a private key onto a third device. Service accounts are a different problem, and for those I prefer a Cloudflare Access service token over a shared key.
Failure Modes and Troubleshooting
1. Cloudflare error 1033 on the hostname
Symptom: the browser shows “Argo Tunnel error 1033” and the tunnel shows as unhealthy in the Zero Trust dashboard.
sudo systemctl status cloudflared --no-pager
sudo journalctl -u cloudflared -n 50 --no-pager
sudo cloudflared tunnel info ssh-edge
The common causes are a stale credential file after tunnel create was rerun, a config.yml with the wrong tunnel name, or outbound UDP 7844 blocked by the host firewall. If your provider filters non-standard outbound UDP, add --protocol http2 on the service command line and restart.
2. Access allows the user, but the session closes after a few seconds
Symptom: authentication succeeds, the terminal opens, and then drops with an empty banner.
This is almost always an sshd problem rather than an Access problem. Check journalctl -u ssh -n 30 for Connection reset by peer or Timeout before authentication. Raise LoginGraceTime to 120 seconds and confirm that ClientAliveInterval is set, because idle sessions on a mobile link get reaped aggressively by intermediate NAT.
3. The policy is bypassed because someone kept a public port open
Symptom: the Zero Trust logs show no authentication events for a user who claims they connected fine.
sudo ss -tlnp | grep ':22\b'
sudo nft list ruleset | grep -A3 'dport 22'
A leftover sshd instance on a second address, or a host firewall rule that still permits 22 from a management range, gives you a path around Access that produces no audit trail. This is the one failure mode I would call a security incident rather than an operational annoyance. Close it before you tell anyone the tunnel is live.
Production Verification Checklist
| Check | Command or location | Expected |
|---|---|---|
| No public SSH listener | ss -tlnp | grep :22 | Only 127.0.0.1:22 |
| Tunnel healthy | cloudflared tunnel info ssh-edge | 4 active connections |
| Service persistent | systemctl is-enabled cloudflared | enabled |
| Access policy attached | Zero Trust dashboard | At least 2 policies |
| Session duration | Zero Trust dashboard | 8 hours or less |
| Browser rendering on | Zero Trust dashboard | Enabled |
| Extra hostnames refused | curl -sI https://random.dowithsudo.com | HTTP 404 from the catch-all |
| Auth auditable | Zero Trust logs | Login events with identity |
| Host firewall clean | nft list ruleset | grep 'dport 22' | No allow rule from WAN |
Run the first and last rows after every configuration change. They are the two checks that catch a tunnel that looks healthy while the old access path is still standing open, which is exactly how the previous setup in this article went wrong in the first place.
Closing Thoughts
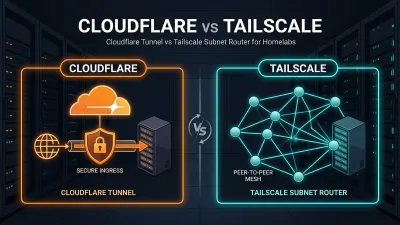
If you are weighing this against a mesh VPN, the two solve different problems. A mesh gives you a routable private network between devices, which is what you want for database admin over arbitrary ports. A tunnel gives you one hostname, one identity policy, and a browser session, which is what you want for shell access from a machine you do not control. The comparison in WireGuard vs Tailscale covers the mesh side in more depth.
My advice is to pick the target host that generates the loudest auth.log, move it behind a tunnel this week, and then run grep -c 'Failed password' /var/log/auth.log thirty days later. On the instance from the opening story, that count went from 118,000 failed logins to zero. Not fewer. Zero, because there is no longer anything for a scanner to reach.
Implementation Checklist
- Replicate the steps in a controlled lab before production changes.
- Document configs, versions, and rollback steps.
- Set monitoring + alerts for the components you changed.
- Review access permissions and least-privilege policies.
Official References
Need a Hand?
If you want this implemented safely in production, I can help with assessment, execution, and hardening.
Contact MeDeploy on Cloud Infrastructure with $200 Free Credit
Spin up high-performance SSD cloud Droplets, managed Kubernetes, and databases in seconds. Test your containers and production workloads with $200 in free credits.
Transparency: We independently test and operate all recommended infrastructure. If you use our partner links, you receive free promotional credits and support our testing lab at zero extra cost to you.
Weekly Production DevOps Runbooks
Join 1,000+ infrastructure engineers receiving real-world Linux troubleshooting, Proxmox clustering setups, and Docker optimization runbooks every Tuesday. Zero spam, unsubscribe anytime.

About the Author
Kamandanu Wijaya
IT Infrastructure & Network Administrator
Infrastructure & network administrator with 15+ years of enterprise experience, focused on stability, security, and automation.
Certifications: Google IT Support, Cisco Networking Academy, DevOps.
Need IT Solutions?
DoWithSudo is ready to help setup servers, VPS, and your security systems.
Contact Us