LVM Crash Case Study, Recovering from Missing PVS and Boot Failures
Have you ever felt that cold shiver down your spine when you realize your main database server has suddenly died and refuses to come back to life? That was my reality last week.
In this article, we cover LVM error PVS/LVS in a practical way so you can apply it with confidence.
It all started with a mundane “Disk Usage Warning” alert. But when I logged in to check, the situation was far worse. The /var/lib/mysql directory was completely empty. The mount point was gone. And when I tried to reboot the server, it got stuck in emergency mode.
The culprit? A failure at the LVM (Logical Volume Manager) layer. One of the physical disks was deemed “missing” by the system, causing the entire Volume Group to become inconsistent.
In this article, I will dissect the incident step by step. From the initial panic and wrong diagnoses to finally recovering the system using LVM commands that are rarely touched in daily operations.
Early symptoms: where is my data?
That morning, our main web application reported a “Database Connection Error”. My initial assumption was standard: maybe the MySQL service crashed.
I tried to start it manually:
sudo systemctl start mysqlFailed. The error log in /var/log/syslog stated: Directory /var/lib/mysql not found.
My heart started beating faster. I checked the list of mount points:
df -hSure enough, the partition that was supposed to mount that data directory was missing from the list.
Investigating layer by layer
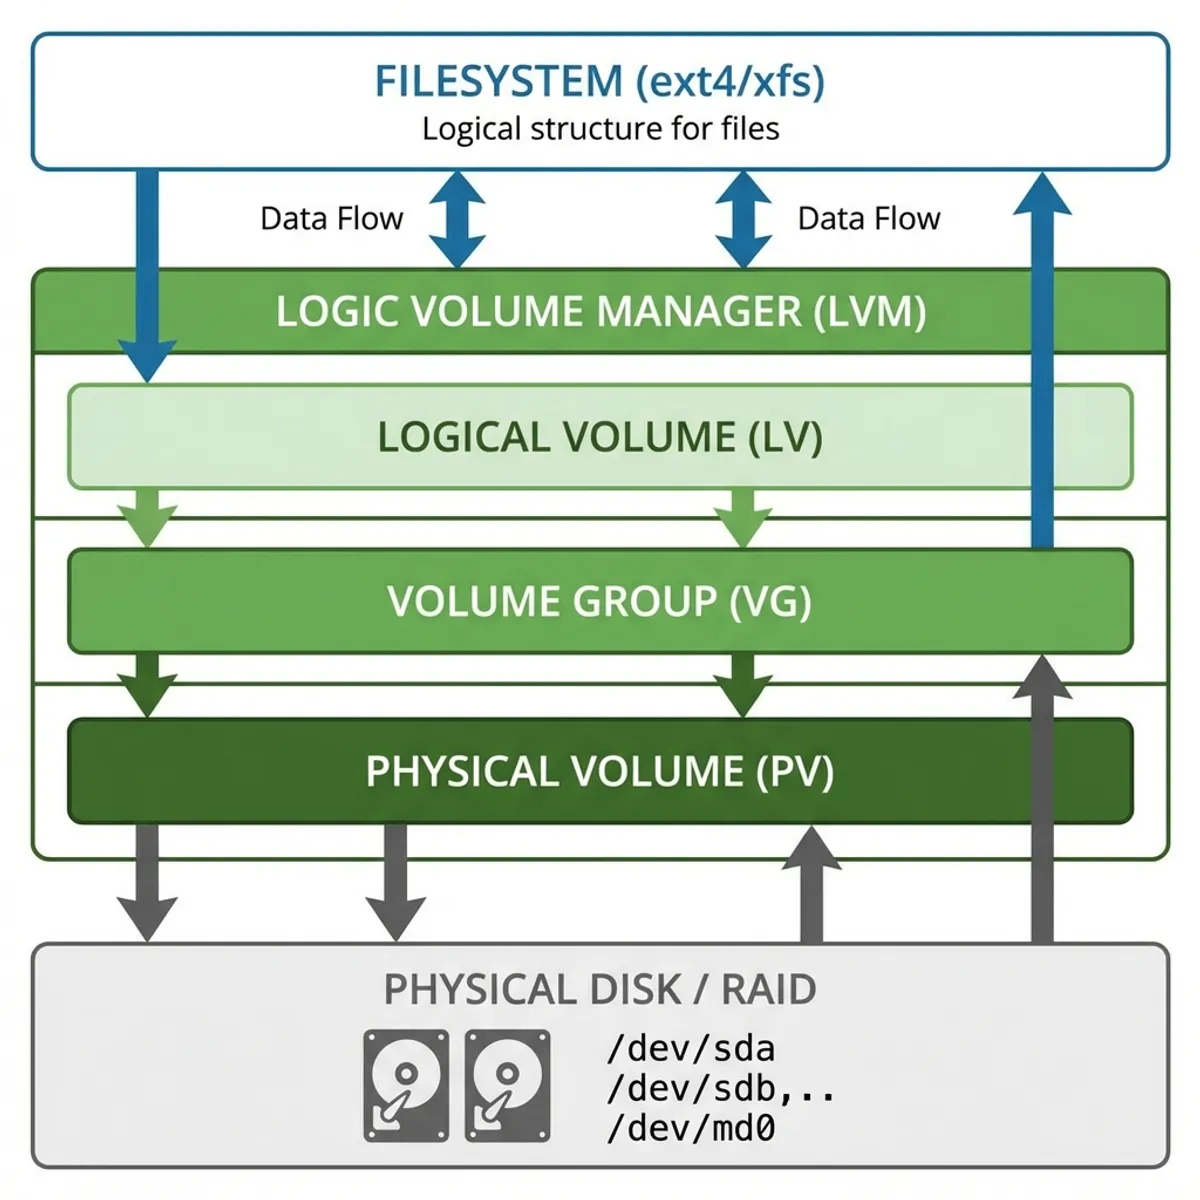
In Linux, storage is like a layer cake. You have to check it from the bottom up.
Check physical disk (bottom layer)
I used lsblk to see if the operating system could still detect the physical hard disks.
lsblkThe result:
NAME    MAJ:MIN RM  SIZE RO TYPE MOUNTPOINT
sda       8:0    0   50G  0 disk
├─sda1    8:1    0  500M  0 part /boot
└─sda2    8:2    0 49.5G  0 part /
sdb       8:16   0  100G  0 disk
└─sdb1    8:17   0  100G  0 part
Disk /dev/sdb (the data disk) was still detected. This was good news. It meant the disk hadn’t exploded or physically vanished.
Check lvm (middle layer)
This is where the problem became clear. I ran the pvs (Physical Volume Scan) command to look at the LVM disk status.
sudo pvsThe output made me weak in the knees:
  PV         VG        Fmt  Attr PSize    PFree
  /dev/sda2  rootvg    lvm2 a--    49.50g    0
  unknown    datavg    lvm2 a-m   100.00g    0
Notice the word unknown and the attribute a-m (m = missing). LVM knew there was a member of the datavg group missing, but it couldn’t find /dev/sdb1 which was supposed to be that member.
Because one of its members was “missing”, LVM automatically deactivated all Logical Volumes on top of it to protect data integrity.

Why did this happen?
After digging through dmesg, I found many I/O error messages on /dev/sdb.
dmesg | grep sdbIt turned out the disk was a virtual volume (in a VMware environment) that had experienced a momentary detach due to a hiccup on the hypervisor storage side. Even though the disk had reconnected, LVM metadata had already marked it as “failed/missing”.
Recovery steps
Don’t rush to run disk repair commands like fsck because the problem isn’t with the filesystem, but with its container (LVM).
Step 1: rescan
I tried telling LVM to rescan all available block devices.
sudo pvscanOutput:
  PV /dev/sda2   VG rootvg   lvm2 [49.50 GiB / 0    free]
  PV /dev/sdb1   VG datavg   lvm2 [100.00 GiB / 0    free]
Magic! /dev/sdb1 was detected again. However, the Volume Group datavg was not yet active.
Step 2: check volume group status
sudo vgsNow the status showed nothing “missing”, but the Logical Volume (LV) inside it was still inactive.
Step 3: re-activate volume
This was the decisive moment. I had to force LVM to reactivate the volume.
sudo vgchange -ay datavg-a= activatey= yes
Output:
1 logical volume(s) in volume group "datavg" now active
Step 4: mount and verify
Now the device /dev/datavg/mylv reappeared. I mounted it carefully.
sudo mount /dev/datavg/mylv /var/lib/mysqlI held my breath while checking the contents:
ls -l /var/lib/mysqlAll files were there! .ibd, .frm, everything complete.
Vital lessons
This incident taught me that:
- Monitoring the LVM Layer is Critical: I had only been monitoring Disk Space (df -h). I forgot to monitor LVM status (
vgsorlvs). If I had known the disk was flapping, I could have acted sooner. - Don’t Panic: When a directory vanishes, the first instinct is often “reformat” or “restore from backup”. In reality, the data is often still there, just inside a locked container.
- Partition Documentation: I was incredibly grateful to have server notes explaining what was on
/dev/sdb. Without them, I might have been guessing which disk was the problem.
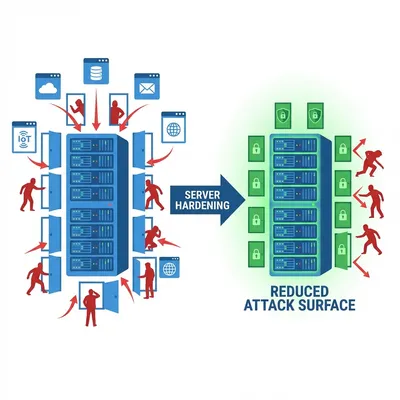
Storage troubleshooting requires layer by layer understanding. The same approach applies when handling Docker container crashes. And to prevent issues in the future, make sure your server is properly hardened.
Now, whenever there’s a disk alert, the first thing I type isn’t reboot, but lsblk and pvs. Understand the layers, and you will find the solution.
I hope this guide on LVM error PVS/LVS helps you make better decisions in real-world situations.
Implementation Checklist
- Replicate the steps in a controlled lab before production changes.
- Document configs, versions, and rollback steps.
- Set monitoring + alerts for the components you changed.
- Review access permissions and least-privilege policies.
Official References
Need a Hand?
If you want this implemented safely in production, I can help with assessment, execution, and hardening.
Contact MeAbout the Author
Kamandanu Wijaya
IT Infrastructure & Network Administrator
Infrastructure & network administrator with 14+ years of enterprise experience, focused on stability, security, and automation.
Certifications: Google IT Support, Cisco Networking Academy, DevOps.
View ProfileNeed IT Solutions?
DoWithSudo team is ready to help setup servers, VPS, and your security systems.
Contact Us