Linux Server Hardening, Best Practices Stop Leaving Your Infrastructure Exposed

I remember clear as day the first time I rented a cheap VPS for my personal projects. With the excitement of many beginners, I installed Linux, set a mediocre root password, and left it running overnight.
In this article, we cover Linux server hardening in a practical way so you can apply it with confidence.
The following morning, out of curiosity, I checked the system logs. My eyes widened as I saw thousands of failed SSH login attempts from random IP addresses across the globe. Thousands of bots were hammering away at my server’s door every single second. It was a wake-up call - running a server on the public internet without proper security is like leaving your front door wide open in a crowded city.
Server hardening isn’t just a theoretical topic in a cybersecurity textbook, it’s the primary line of defense between your valuable data and a world full of potential threats. In this guide, I’ll share the practical steps of securing Linux servers based on my real world experience managing production environments.
Why does server hardening actually matter?
By default, most Linux distributions are configured for ease of access. This is great for learning on local machines, but dangerously porous for servers exposed to the internet.
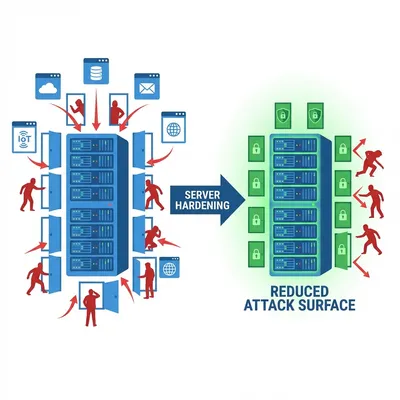
The core goal of Server Hardening is to reduce the Attack Surface. Imagine your server as a building. A building with 50 unguarded doors is much easier to breach than one with a single heavily guarded entrance.
Hardening is the ongoing process of closing unnecessary doors, replacing weak locks with military-grade ones, and setting up surveillance in every corner. It’s about being proactive rather than waiting for an incident to happen.

Step 1: securing the main entrance (SSH hardening)
SSH (Secure Shell) is the gateway to your server. Because it’s the main entry point, it’s also the first place attackers will try to break into.
The very first task I perform on any new server is tightening the configuration in /etc/ssh/sshd_config.
Stop using passwords: move to key-based auth
Passwords, no matter how complex, can eventually be cracked via brute force. SSH Keys are virtually impossible to guess. If you aren’t using keys, you aren’t really secure.
Disable root login and password authentication
Once I’ve verified my SSH key works, I immediately shut down the ability to log in as root and disable password authentication entirely.
My recommended SSH configuration looks like this:
# Edit /etc/ssh/sshd_config
# Find and modify these parameters:

PermitRootLogin no
PasswordAuthentication no
PubkeyAuthentication yes
MaxAuthTries 3
After saving the changes, remember to restart the service:
sudo systemctl restart ssh
Operator’s Perspective: Many recommend changing the default SSH port (22) to something non-standard, like port 2222. While this isn’t “impenetrable security,” it is remarkably effective at cutting log noise by stopping millions of automated scanners that only target the default port.

Extra SSH hardening people forget
Additional sshd_config parameters that tighten access:
AllowUsers adminops deploy
LoginGraceTime 30
ClientAliveInterval 300
ClientAliveCountMax 2
X11Forwarding no
AllowTcpForwarding no
What they do:
AllowUsers: only specific users can SSH.LoginGraceTime: limit login time.ClientAlive*: drop idle connections.X11ForwardingandAllowTcpForwarding: disable if not needed.
Validate and reload:
sshd -t
sudo systemctl reload ssh
Step 2: the principle of least privilege (user management)
In security, less is more. Users should only have the permissions absolutely necessary to do their jobs.
Never use the root account daily
Always create a standard user account with sudo privileges. This prevents you from accidentally running a destructive command as root and provides an audit trail of who ran what command.
# Add a new user
sudo adduser danu

# Grant sudo privileges
sudo usermod -aG sudo danu
Make it a habit to audit your user list regularly and remove any accounts belonging to people no longer on the project.
Step 2.1: sudoers and access audit
Don’t grant blanket sudo. Use visudo and scope privileges:
sudo visudoExample rules:
%admin  ALL=(ALL) ALL
deploy  ALL=(ALL) NOPASSWD:/bin/systemctl restart nginx
Here, deploy can only restart Nginx, not perform full root access.
Step 3: placing the perimeter fence (firewall)
If your server is a house, the firewall is the perimeter fence. It ensures that only traffic you’ve explicitly invited can get through.
For Ubuntu or Debian systems, I swear by UFW (Uncomplicated Firewall). It’s simple, powerful, and hard to mess up.
# Deny everything by default
sudo ufw default deny incoming
sudo ufw default allow outgoing

# Only open what you need
sudo ufw allow 22/tcp    # SSH
sudo ufw allow 80/tcp    # HTTP
sudo ufw allow 443/tcp   # HTTPS

# Turn it on
sudo ufw enable
You can verify your security posture by checking which services are actually listening for connections:
sudo ss -tulpnIf you see an app listening on a port you didn’t know about, that’s a red flag you need to investigate immediately.

Firewall advanced: rate limits and default deny
UFW is simple, but underneath it’s iptables/nftables. Add rate limiting to slow brute-force attempts:
sudo ufw limit 22/tcpIf you need full control, consider managing rules directly with nftables.
Step 4: automating defense with fail2ban
Even with keys and firewalls, bots will still hammer your server. Fail2ban is the bouncer that kicks them out.
It monitors your authentication logs and, after a few failed attempts, it automatically bans that IP address at the firewall level for a certain period. Simple, yet incredibly effective.
sudo apt install fail2banA common configuration I use in jail.local is banning an IP for 24 hours after 3 failed attempts. It makes your server a very unappealing target for automated scripts.
Step 5: kernel hardening with sysctl
Some kernel parameters reduce network attack surface:
sudo sysctl -w net.ipv4.icmp_echo_ignore_broadcasts=1
sudo sysctl -w net.ipv4.conf.all.rp_filter=1
sudo sysctl -w net.ipv4.conf.all.accept_source_route=0
sudo sysctl -w net.ipv4.conf.all.accept_redirects=0
To persist settings, add them to /etc/sysctl.d/99-hardening.conf and run:
sudo sysctl --systemStep 6: security through maintenance (patching)
Security is not a “set it and forget it” task. New vulnerabilities are discovered daily. An unpatched server is a ticking time bomb.
I highly recommend enabling Unattended Upgrades. This allows your server to automatically download and install security patches the moment they’re released.
sudo apt install unattended-upgrades
sudo dpkg-reconfigure -plow unattended-upgrades
This simple setup ensures that even when you’re on vacation, your server is protecting itself against newly discovered exploits.
Step 7: observability and log monitoring
Security is as much about detection as it is about prevention. You need to know when someone is knocking.
Take a peek at your auth logs every now and then:
sudo tail -f /var/log/auth.logYou’ll be surprised at how active the “war” is on the internet. Additionally, a solid backup strategy is part of a security mindset. Backup isn’t a preventative measure per se, but it’s your only lifeline if your security layers fail or data is corrupted.
Extra recommendations:
- Auditd for system activity auditing:
sudo apt install auditd sudo systemctl enable --now auditd - AIDE for file integrity monitoring:
sudo apt install aide sudo aideinit - Centralized logging (ELK/Graylog/Cloud logging) so logs survive even if a server dies.
My personal server hardening checklist
Whenever I spin up a new node, I run through this checklist:
- Update all system packages.
- Create a non root sudo user.
- Set up SSH keys and disable password auth.
- Disable root login in SSH config.
- Configure firewall rules (allow 22, 80, 443).
- Install and configure Fail2ban.
- Apply baseline
sysctlhardening. - Enable automatic security updates.
- Enable audit/log monitoring (auditd/central logging).
- Disable unused network services.
What hardening does not solve
There’s a major trap to avoid: Hardening the server doesn’t fix a broken application. If you secure your Linux OS perfectly but your web application has an unsanitized input leading to SQL Injection, or your app password is admin123, an attacker can still pwn your system through the app layer.
Hardening secures the “container.” The content of that container (your code) is still your responsibility as a developer.
Conclusion
Early in my career, I viewed these steps as tedious chores. Now, they are a mandatory ritual my price of admission to the internet. Spending an extra 15 minutes during deployment saves me days of headaches later.
Security is a journey, not a destination. Stay curious, watch your logs, and never stop refining your defense layers.
Hardening is the first step. Make sure you also understand how to troubleshoot production when issues arise, as I discuss in my Docker container crash case study and LVM storage failure case study.
Do you have a specific ritual when you set up a new server? Or a “war story” that changed how you view security? Let’s hear about it in the comments below! Happy (and safe) hosting!
I hope this guide on Linux server hardening helps you make better decisions in real-world situations.
Implementation Checklist
- Replicate the steps in a controlled lab before production changes.
- Document configs, versions, and rollback steps.
- Set monitoring + alerts for the components you changed.
- Review access permissions and least-privilege policies.
Official References
Need a Hand?
If you want this implemented safely in production, I can help with assessment, execution, and hardening.
Contact MeAbout the Author
Kamandanu Wijaya
IT Infrastructure & Network Administrator
Infrastructure & network administrator with 14+ years of enterprise experience, focused on stability, security, and automation.
Certifications: Google IT Support, Cisco Networking Academy, DevOps.
View ProfileNeed IT Solutions?
DoWithSudo team is ready to help setup servers, VPS, and your security systems.
Contact Us