Case Study, Handling a DDoS Attack with MikroTik on an Office Network
The phone rang at exactly 10 AM. The client’s office number. I picked up with a bad feeling.
In this article, we cover MikroTik DDoS in a practical way so you can apply it with confidence.
“Sir, the office internet is completely dead. Nobody can work.”
I immediately remoted into their main router. A MikroTik RB750Gr3. The Winbox screen showed something that made my stomach turn. CPU usage at 100%. The WAN interface flooded with abnormal incoming traffic. Hundreds of thousands of connections per second from IP addresses I did not recognize.
This was not a normal outage. This was a DDoS attack.
Attack timeline
This client was an export company with about 50 users. Their network was simple. One MikroTik router as the gateway, connected directly to the ISP with a static public IP. There had never been any significant issues before.
The attack started around 09:30. Initially, employees complained the internet was “slow.” Within 15 minutes, slow turned into “completely unusable.” Emails would not send. Video calls with overseas buyers disconnected. Operations ground to a halt.
Initial identification
I logged into the MikroTik via Winbox using a direct LAN connection. This is a crucial first step. Do not try to remote via WAN during an ongoing attack because the connection will be unstable.
/system resource printThe output showed:
- CPU: 100%
- Free Memory: nearly exhausted
- Uptime: stable (meaning the router had not restarted on its own)
Next, I checked connection tracking:
/ip firewall connection print count-onlyThe result was shocking. Over 65,000 active connections. For a 50 person network, normal numbers are around 2,000 to 5,000.
Type of attack
From analyzing the traffic, I concluded this was a SYN Flood Attack. The attacker was sending thousands of SYN packets (TCP connection requests) without ever completing the handshake. The router was overwhelmed trying to track all these “half open connections.”
/tool torch interface=ether1-WANThe source IPs were varied. Most likely spoofed or from a botnet. There was no point blocking them one by one.
Emergency mitigation steps
During an ongoing attack, the main priority is restoring connectivity for internal users. Optimization can come later.
Step 1: limit connection tracking
MikroTik has a default limit for the number of connections it can track. I needed to adjust and add more aggressive timeouts.
/ip firewall connection tracking
set tcp-syn-sent-timeout=5s
set tcp-syn-received-timeout=5s
set tcp-established-timeout=30m
set tcp-close-timeout=10s
set tcp-close-wait-timeout=10s
By shortening timeouts for incomplete connections, the router can “forget” junk connections faster.
Step 2: enable syn flood protection
MikroTik has a built in feature for this:
/ip settings set tcp-syncookies=yesSYN cookies allow the router to handle SYN requests without storing state in memory until the handshake is complete. This is very effective against SYN floods.
Step 3: rate limiting with firewall
I created a rule to limit the number of new connections per IP:
/ip firewall filter
add chain=input protocol=tcp tcp-flags=syn connection-state=new \
    src-address-list=syn-flood action=drop
add chain=input protocol=tcp tcp-flags=syn connection-state=new \
    connection-limit=30,32 action=add-src-to-address-list \
    address-list=syn-flood address-list-timeout=1d
The logic is simple. If one IP creates more than 30 new connections simultaneously, that IP gets blacklisted for 1 day.
Step 4: drop invalid connections
Invalid connections (malformed packets) are often used in attacks. Just drop them.
/ip firewall filter
add chain=input connection-state=invalid action=drop
add chain=forward connection-state=invalid action=drop
Make sure these rules are at the top of your firewall chain.
Results after mitigation
Within 10 minutes of applying the configuration, CPU usage dropped from 100% to about 40%. Active connections dropped drastically to around 8,000. Still above normal, but the router could breathe again.
The office internet came back online. Employees could work again. Video calls resumed.
The attack continued for several more hours, but the router was now capable of filtering junk traffic and prioritizing legitimate traffic.
Post attack investigation
After the situation stabilized, I conducted a deeper analysis.
Why were they attacked?
This is a question that often comes up. The answers can vary.
- Random scan: Botnets often scan IP ranges and attack anyone who looks “weak”
- Competitors: In certain industries, DDoS attacks are hired to take down competitors
- Extortion: Attackers demand ransom to stop the attack
In this case, there was no ransom demand. Most likely a random attack from a botnet.
What could be improved?
I provided long term recommendations:
-
Contact the ISP: Large ISPs usually have DDoS protection services at the upstream level. More effective than relying on the router alone.
-
Consider Cloudflare or similar services: For critical web services, placing Cloudflare in front can filter attacks before they reach your network. I have written about Cloudflare Tunnel as a safer alternative to port forwarding.
-
Network segmentation: Separate public servers from the internal network. If there is an attack, the impact is more contained.
-
Proactive monitoring: Set up alerts for abnormal CPU usage and connection counts.
Complete firewall configuration for DDOS protection
Here is a configuration template I use as a baseline for clients with internet exposure:
# Basic DDoS Protection for MikroTik

# Enable SYN Cookies
/ip settings set tcp-syncookies=yes

# Connection Tracking Optimization
/ip firewall connection tracking
set tcp-syn-sent-timeout=5s
set tcp-syn-received-timeout=5s
set tcp-established-timeout=1h
set tcp-close-timeout=10s
set tcp-close-wait-timeout=10s
set tcp-fin-wait-timeout=10s
set tcp-last-ack-timeout=10s
set tcp-time-wait-timeout=10s

# Firewall Filter Rules
/ip firewall filter

# Drop invalid connections
add chain=input connection-state=invalid action=drop comment="Drop Invalid"
add chain=forward connection-state=invalid action=drop

# Accept established and related
add chain=input connection-state=established,related action=accept
add chain=forward connection-state=established,related action=accept

# ICMP rate limit
add chain=input protocol=icmp limit=10,20:packet action=accept
add chain=input protocol=icmp action=drop

# SYN Flood Protection
add chain=input protocol=tcp tcp-flags=syn connection-state=new \
    src-address-list=syn-flood action=drop comment="Drop SYN Flood"
add chain=input protocol=tcp tcp-flags=syn connection-state=new \
    connection-limit=30,32 action=add-src-to-address-list \
    address-list=syn-flood address-list-timeout=1d

# Port scan detection
add chain=input protocol=tcp psd=21,3s,3,1 action=add-src-to-address-list \
    address-list=port-scanners address-list-timeout=2w
add chain=input src-address-list=port-scanners action=drop

# Accept from LAN
add chain=input in-interface=bridge-LAN action=accept

# Drop everything else on input
add chain=input action=drop comment="Drop All Other Input"
Adjust the limit values based on your network size and normal traffic behavior.
Lessons from this incident
After this incident, there are several things I reflected on.
First, no network is too small to be attacked. This client was not a large corporation. They had no sensitive data exposed publicly. But they still became a target.
Second, layered defense is essential. MikroTik RouterOS is a capable router, but one device cannot handle everything. Combine it with protection at the ISP level and cloud services when possible.
Third, configuration documentation really helps. I could act quickly because I was already familiar with their network topology. Imagine if I had to learn from scratch while the attack was ongoing.
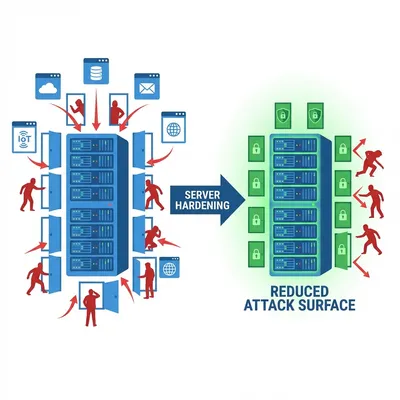
Network security is a broad topic. If you manage Linux servers, make sure you have also applied hardening best practices as an additional layer of defense.
Closing thoughts
DDoS attacks are no longer exclusive to giant corporations. With botnets cheap to rent and tools easy to access, anyone can become a target.
MikroTik RouterOS provides powerful enough tools for basic mitigation. But remember, this is front line defense, not a complete solution. Collaborating with your ISP and considering additional protection services is a wise step for critical networks.
Most importantly, do not wait until you are attacked to take action. Configure basic protection now, before you receive that panicked phone call in the morning like I did.
I hope this guide on MikroTik DDoS helps you make better decisions in real-world situations.
Implementation Checklist
- Replicate the steps in a controlled lab before production changes.
- Document configs, versions, and rollback steps.
- Set monitoring + alerts for the components you changed.
- Review access permissions and least-privilege policies.
Official References
Need a Hand?
If you want this implemented safely in production, I can help with assessment, execution, and hardening.
Contact MeAbout the Author
Kamandanu Wijaya
IT Infrastructure & Network Administrator
Infrastructure & network administrator with 14+ years of enterprise experience, focused on stability, security, and automation.
Certifications: Google IT Support, Cisco Networking Academy, DevOps.
View ProfileNeed IT Solutions?
DoWithSudo team is ready to help setup servers, VPS, and your security systems.
Contact Us